
.webp)


How to Install Cedar Siding
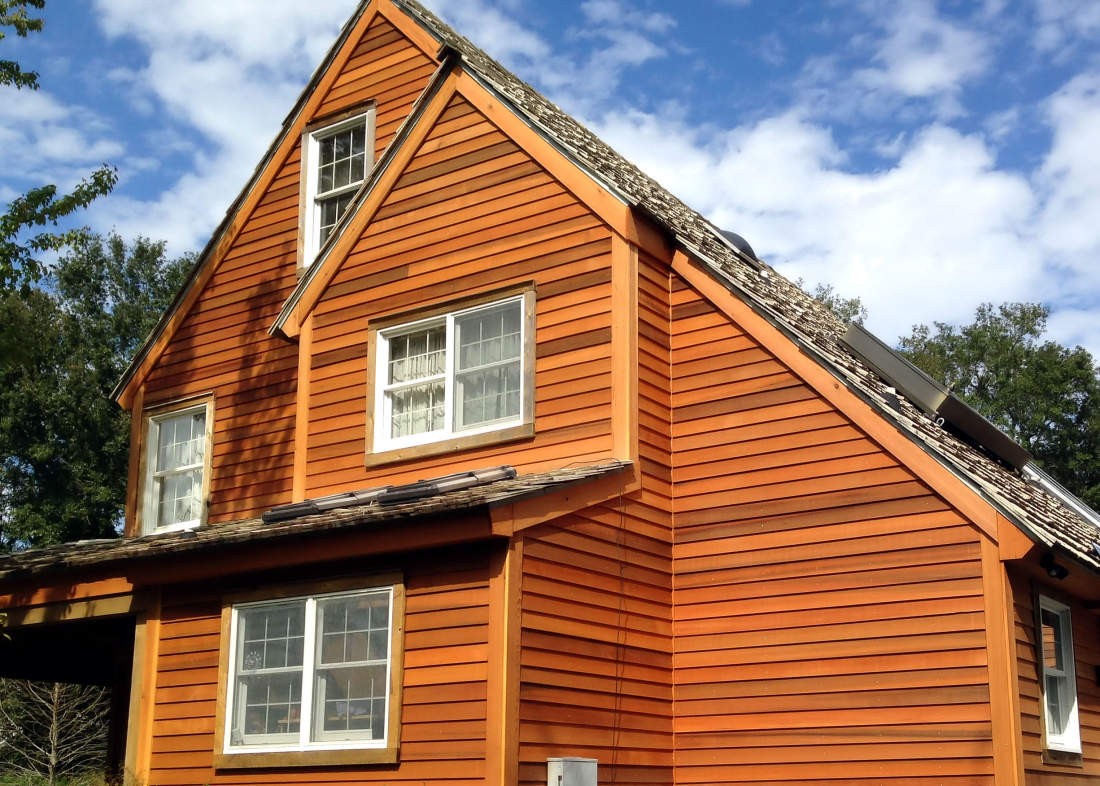
To install cedar siding, start at the bottom of the wall with a level starter course, maintain at least 6 inches of ground clearance, and use corrosion-resistant stainless steel fasteners that penetrate a minimum of 1-1/4 inches into solid wood. Cedar siding performs best when all six sides are pre-finished before installation, when a breathable house wrap and metal flashing protect the wall assembly underneath, and when vertical furring strips create a rainscreen air gap that lets moisture drain and dry behind the boards. Cedar siding lasts 20 to 40 years with proper care and can exceed 60 years in ideal conditions, according to multiple industry sources. The Western Red Cedar Lumber Association (WRCLA) publishes the standard installation specifications that builders and homeowners follow across all cedar siding profiles, from bevel and tongue-and-groove to shakes and board-and-batten. This guide covers every step of the installation process, starting with what goes behind the cedar and ending with how to keep it looking good for decades.
What Goes Under Cedar Siding?
Under cedar siding there should be a weather-resistive barrier (house wrap), metal flashing around all windows and doors, and vertical furring strips that create a rainscreen air gap between the siding and the sheathing. These three layers work together to prevent moisture from reaching the wall framing while still allowing water vapor to escape from inside the wall cavity. The WRCLA recommends breathable house wrap like Tyvek DrainWrap installed over the exterior sheathing, with the seams overlapped and taped to form a continuous moisture barrier.
Flashing is an equally critical layer. Metal flashing must be installed at the top of every window, door, and wall penetration, angled downward to direct water away from the opening and onto the face of the siding below. According to Real Cedar's installation guidelines, caulking in place of flashing is not acceptable because caulk deteriorates over time and traps moisture rather than redirecting it. Flashing also belongs at any point where the siding material or direction changes, such as where a bandboard meets the siding field or where a second-story wall meets a roof line. Siding and trim that extend down to a roof surface require a minimum 2-inch gap to prevent moisture wicking.
The third layer, the rainscreen, is what separates a cedar siding installation that lasts decades from one that fails prematurely. Vertical furring strips, typically 3/4-inch to 1-inch thick pressure-treated lumber spaced 16 or 24 inches on center, create an air cavity between the house wrap and the back of the siding. This cavity allows any water that penetrates the siding to drain downward and any trapped moisture to dry through natural air convection. Without a rainscreen, moisture that gets behind cedar siding sits against the house wrap and promotes fungal growth, wood decay, and finish failure. In the Pacific Northwest climate, where Central Washington homeowners experience both wet winters and hot dry summers, a rainscreen is especially important for long-term siding performance.
How Do You Prepare Cedar Siding Before Installation?
You prepare cedar siding before installation by acclimating the wood to your local climate and pre-finishing all six sides of every board with stain, sealer, or primer before it goes on the wall. Acclimation is the single most common step that installers skip, and it is also the most costly mistake. Wood changes dimensions as it adjusts to the temperature and humidity of its new environment. Installing cedar during this adjustment phase leads to gaps, buckling, warping, and split boards after the wood finishes moving.
Kiln-dried cedar can be installed immediately in most conditions, but unseasoned or air-dried cedar needs up to 30 days to acclimate, according to Real Cedar's installation specifications. Unband the wood, stack it on spacers (called stickers) placed every 3 feet to allow air circulation on all sides, and store it in a covered area that matches the outdoor conditions where the siding will live. Never store cedar on grass where moisture can accumulate underneath the boards, and never store it in a heated or air-conditioned room that does not match the outdoor environment.
Pre-finishing all six sides of each board before installation is the best practice recommended by the WRCLA. Applying stain, sealer, or primer to the front, back, edges, and end cuts creates a uniform moisture barrier that prevents water from entering the wood from any direction. End grain absorbs moisture faster than face grain, so every cut end must be sealed immediately after cutting and before the board goes on the wall. Pre-finishing at the mill or in a controlled workshop environment produces a more consistent, higher-quality finish than field application after the siding is already installed.
How Do You Attach Cedar Siding?
You attach cedar siding by face-nailing each board to the wall studs or furring strips with corrosion-resistant stainless steel ring-shank nails, starting from the bottom of the wall and working upward one course at a time. The specific nailing pattern depends on the siding profile, but the fundamental rule applies to all cedar siding: nails must penetrate at least 1-1/4 inches into solid wood, whether that is a wall stud, blocking, or a furring strip. Here is the general installation sequence:
- Snap a level chalk line around the perimeter of the structure to establish the bottom edge of the starter course at least 6 inches above grade
- Install a starter strip along the chalk line to set the correct angle for the first course of bevel or lap siding
- Place the first board along the starter strip with the bottom edge aligned to the chalk line
- Leave a 1/8-inch expansion gap at butt joints and end cuts to allow the wood to expand and contract with seasonal humidity changes
- Drive stainless steel ring-shank siding nails into the wall studs through the face of the board, spacing nails at a maximum of 24 inches on center
- Overlap horizontal boards by at least 1 inch, or follow the specific overlap specification for your siding profile, and check that every few rows remain level
- Stagger butt joints between courses so no two adjacent courses have joints aligned on the same stud
- Seal all cut ends with primer or stain before installing the board
According to the WRCLA, only hot-dipped galvanized (per ASTM A-153), stainless steel (No. 304 or No. 316), or high-quality aluminum nails should be used for cedar siding. Electroplated and mechanically galvanized fasteners react with the natural preservative oils (thujaplicins) in cedar, producing black streaks and stains that bleed through paint and stain. Before starting installation, gather these essential tools and materials:
- Stainless steel ring-shank siding nails (No. 304 or No. 316) sized for your siding thickness plus 1-1/4 inches of penetration into solid wood
- Hammer drill or pneumatic nail gun rated for siding nails
- Chalk line and 4-foot level for establishing the starter course
- Circular saw or miter saw with a fine-tooth blade for clean cuts on cedar
- Tape measure, pencil, and speed square for marking and layout
- Exterior-grade stain or sealer for treating all cut ends immediately
- High-performance acrylic-latex or polyurethane caulk for joints around windows and doors
- Furring strips (3/4-inch minimum, pressure-treated) for rainscreen installation
Stainless steel ring-shank nails are the best choice for siding installation because the ring shank grips the framing member and resists withdrawal far better than smooth-shank nails.
Do You Nail or Screw Cedar Siding?
You nail cedar siding, not screw it. All standard cedar siding profiles are designed for face nailing. Nails allow the wood to move slightly as it expands and contracts with moisture changes throughout the year. Screws lock the board rigidly in place, which can cause splitting as the wood moves against the fixed fastener point. The WRCLA does not recommend screws for any standard cedar siding application. For siding up to 6 inches wide, use one nail per bearing point, placed 1 inch above the overlap. For siding 8 inches wide and wider, use two nails per bearing point, spaced 2-1/2 to 3 inches apart to allow dimensional movement without splitting. Never nail through two overlapping pieces of siding at the same point because this pins both boards and prevents independent movement.
How to Install Cedar Bevel Siding
Cedar bevel siding, also called clapboard siding, installs horizontally from the bottom up with each course overlapping the one below by at least 1 inch. Bevel siding is the most common cedar siding profile and the easiest to install. The thick edge of each board faces down and the thin edge faces up, creating a natural overlap that sheds water. Nail each board to the studs with one nail per stud, placed just above the overlap line so the nail passes through only the upper board. This lets the lower board expand and contract freely behind the overlap. According to the WRCLA, bevel siding should be nailed at a maximum of 24 inches on center when applied over solid sheathing, and at 16 inches on center when applied without sheathing.
For corners, you have two options. Mitered corners produce a clean, professional look but require precise carpentry skills because the miter must fit tightly for the full depth of the joint. Corner boards are easier to install. Apply 3/4-inch or 1-1/4-inch thick corner boards to the sheathing first, then butt the siding tightly against the narrow edge of the corner board. Always apply primer or stain to cut ends at corners and butt joints before fitting the boards.
How to Install Cedar Tongue and Groove Siding
Cedar tongue and groove siding installs by fitting the tongue of each board into the groove of the adjacent board, creating a tight interlocking joint that resists water penetration. Tongue and groove can be installed horizontally or vertically. For horizontal installation, start at the bottom with the groove edge facing down and the tongue facing up so the next course slides down over it. For vertical installation, nail the boards to horizontal blocking or furring strips spaced at a maximum of 24 inches on center.
Narrow tongue and groove profiles (4 inches and 6 inches) can be blind-nailed through the tongue at a 45-degree angle, which hides the fastener behind the overlapping board. Wider profiles require face nailing with two nails per bearing point. Blind nailing produces a cleaner appearance with no visible fastener heads, but face nailing provides stronger holding power in high-wind areas. A professional siding specialist can evaluate your site conditions and recommend the best nailing approach for your specific profile and exposure.
How to Install Cedar Shake Siding
Cedar shake siding installs in overlapping courses from bottom to top, with each shake offset from the one below to prevent water from following a continuous seam down the wall. Shakes are thicker and rougher than shingles, producing a textured, rustic appearance. Each shake should overlap the course below by at least 1-1/2 inches of weather exposure, and the joints between shakes in one course should be offset at least 1-1/2 inches from the joints in the course above and below. Use two nails per shake, placed 1 inch from each edge and 1 to 2 inches above the exposure line so the nails are covered by the next course.
Cedar shake installation is more labor-intensive than bevel or tongue-and-groove siding because each piece is individually placed and aligned. The irregular thickness of hand-split shakes requires more skill to maintain a consistent exposure line across the wall. Cedar shake siding costs $7 to $16 per square foot installed, according to HomeGuide's 2026 data, compared to $6 to $12 per square foot for cedar clapboard. The higher labor cost reflects the additional time and craftsmanship required for shake installation.
Should You Caulk Between Cedar Siding?
You should caulk cedar siding at joints around windows, doors, corners, and other exterior gaps that are exposed to potential water intrusion, but you should not caulk the horizontal overlap between courses or any joint that would trap moisture inside the wall cavity. According to the WRCLA, high-performance acrylic-latex, acrylic-silicone, polyurethane, or terpolymer rubber caulks work well on cedar. Pure silicone and clear caulks do not adhere well to Western Red Cedar and are not recommended.
Caulking is not a permanent solution and requires regular inspection and maintenance. If caulk fails and goes unnoticed, it traps water rather than blocking it, creating severe moisture problems behind the siding. Never caulk the bottom edge of windows or the bottom of any siding run because those openings serve as weep points that allow trapped moisture to escape the wall cavity. The overlap between horizontal siding courses should never be caulked because that overlap is designed to shed water while allowing the wood to move independently. Caulking the overlap pins the boards together and prevents the natural expansion and contraction that keeps cedar siding tight and crack-free over decades.
Does Cedar Siding Need Furring Strips?
Yes, cedar siding performs best when installed over furring strips that create a rainscreen air gap between the siding and the weather-resistive barrier. The WRCLA recommends rainscreen wall construction for cedar siding installations, especially in climates with significant rain exposure or humidity. Furring strips should be a minimum of 3/4 inch thick and spaced 16 or 24 inches on center, fastened through the house wrap into the structural sheathing with corrosion-resistant screws or ring-shank nails.
The air cavity created by furring strips serves two purposes. First, it provides a drainage plane for any water that penetrates behind the siding. Water runs down the back of the siding, hits the house wrap, and drains out the bottom of the wall rather than sitting against the sheathing. Second, the cavity promotes air convection that dries residual moisture before it can cause decay. A bug screen at the bottom and top of the furring strip cavity prevents insects from nesting in the air gap while still allowing air and water to flow freely. For masonry walls, furring strips are mandatory because masonry has no nail-holding capacity for siding fasteners. The furring strips must be thick enough to allow nail penetration of 1-1/2 inches into solid wood, according to the WRCLA's pre-installation specifications.
What Happens If You Don't Seal Cedar?
If you don't seal cedar siding, the wood absorbs moisture from rain, humidity, and ground splash, which accelerates decay, promotes mold and mildew growth, and causes the wood to crack, warp, and split prematurely. Untreated cedar in humid climates may begin deteriorating within 5 years, according to Peak Home Exteriors. Cedar contains natural thujaplicin oils that resist rot and insects to some degree, but these oils deplete over time, especially in wood exposed to direct sun and rain without a protective finish.
UV radiation from sunlight breaks down the lignin in cedar's cell walls, turning the wood gray and causing surface fibers to loosen and check. A quality stain or sealer blocks UV penetration, slows moisture absorption, and preserves the wood's natural color and structural integrity. Applying a UV-resistant finish every 3 to 5 years is the standard maintenance interval recommended by siding industry professionals. The finish you choose affects both appearance and protection. Transparent stains show the most wood grain but offer the least UV protection. Semi-transparent stains balance grain visibility with moderate UV blocking. Solid-color stains and paints provide the most protection but hide the natural cedar grain entirely.
How Long Does Cedar Siding Last?
Cedar siding lasts 20 to 40 years with proper installation and regular maintenance, and well-maintained installations can exceed 60 years in favorable climates. The actual lifespan depends on the cedar grade, the siding profile, the local climate, and how consistently the homeowner maintains the finish. Cedar shake siding and cedar shingle siding both last 20 to 40 years when properly sealed and maintained, according to multiple industry sources including the WRCLA and K.P. LaMarco's material guides.
The cedar itself is naturally durable. Western Red Cedar resists rot, decay, and insect damage better than most softwoods because of its high concentration of thujaplicin extractives, natural chemical compounds that are toxic to wood-destroying fungi and insects. The limiting factor on cedar siding lifespan is almost always the finish, not the wood. A home renovation that includes reapplying stain or sealer every 3 to 5 years, cleaning the siding annually, and replacing damaged boards promptly extends the siding's service life well beyond the 20-year minimum.
Cedar Siding ProfileInstalled Cost per Sq Ft (2026)Expected LifespanMaintenance IntervalBest ForBevel / Clapboard$6 - $1220 - 40+ yearsRe-stain every 3-5 yearsTraditional horizontal lookTongue and Groove$7 - $1420 - 40+ yearsRe-stain every 3-5 yearsTight-fitting horizontal or verticalBoard and Batten$7 - $1420 - 40+ yearsRe-stain every 3-5 yearsVertical rustic aestheticCedar Shakes$7 - $1620 - 40+ yearsRe-seal every 3-5 yearsTextured, rustic appearanceCedar Shingles$6 - $1520 - 40+ yearsRe-seal every 3-5 yearsSmooth, uniform coverageShiplap / Channel$6 - $1320 - 40+ yearsRe-stain every 3-5 yearsModern flat-profile look
Cedar siding costs $6 to $16 per square foot installed in 2026, according to SidingCosts.com, with the total project for a typical 2,000-square-foot home ranging from $12,000 to $28,000. Labor accounts for $4 to $7 per square foot of that total, according to HomeGuide. The higher end of the range reflects premium-grade cedar, complex profiles like shakes, and multi-story installations that require scaffolding. For homeowners comparing cedar to other siding materials like LP SmartSide or fiber cement, cedar delivers a warmer, more natural appearance but requires a greater maintenance commitment over its lifespan.
How Do You Maintain Cedar Siding?
You maintain cedar siding by cleaning it annually, inspecting for damage each season, re-staining or re-sealing every 3 to 5 years, and repairing cracked, split, or rotted boards promptly before moisture reaches the sheathing behind them. Annual cleaning removes dirt, pollen, mildew, and organic debris that hold moisture against the wood surface. Use a garden hose with a soft-bristle brush and a mild detergent solution. Avoid high-pressure washing on cedar because the pressure can drive water deep into the wood grain and damage the surface fibers.
Seasonal inspections catch problems early. Look for cracked caulk around windows and doors, loose or lifted boards, exposed nail heads, peeling or flaking finish, and any signs of soft or spongy wood that indicate decay. Repairing damaged cedar siding early prevents water from reaching the sheathing and framing behind the boards, where it can cause structural damage that costs far more to fix than replacing a few siding boards. Re-staining or re-sealing on a 3-to-5-year cycle is the single most important maintenance task for cedar siding longevity. The finish is the wood's primary defense against UV degradation and moisture absorption. When the finish wears thin, the wood absorbs water faster, dries slower, and begins the cycle of checking, cracking, and decay that shortens its lifespan.
Frequently Asked Questions
Will Cedar Rot If It Gets Wet?
Cedar resists rot better than most softwoods because it contains natural thujaplicin oils that are toxic to wood-destroying fungi. Cedar will not rot from occasional rain exposure when it is properly finished and allowed to dry between wettings. Cedar rots when moisture is trapped against the wood for extended periods without drying, such as when siding sits directly on the ground, when the rainscreen air gap is missing, or when the finish has deteriorated and the wood absorbs water faster than it can release it. Maintaining the finish and providing proper drainage and ventilation behind the siding are the two most effective ways to prevent cedar rot.
What Are the Downsides of Cedar Siding?
The downsides of cedar siding are higher upfront cost compared to vinyl or fiber cement, a greater maintenance commitment with re-staining required every 3 to 5 years, susceptibility to moisture damage if the finish is not maintained, and vulnerability to woodpecker damage in some regions. Cedar siding costs $6 to $16 per square foot installed, compared to $4 to $12 for vinyl and $5 to $14 for fiber cement, according to HomeGuide. The ongoing maintenance cost of re-staining adds to the total cost of ownership over the siding's lifespan. For homeowners who prefer low-maintenance exteriors, fiber cement and engineered wood siding offer similar aesthetics with less upkeep.
What Finish Looks Best on Cedar?
The finish that looks best on cedar depends on how much natural wood grain you want to show. Transparent stains display the full grain pattern and natural color variations of cedar. Semi-transparent stains add a hint of color while still letting the grain show through. Solid-color stains and paints completely cover the grain and give the siding a uniform color. For a natural cedar look that darkens and deepens over time, a semi-transparent oil-based stain is the most popular choice among homeowners. For maximum weather protection with a painted appearance, a high-quality 100% acrylic latex solid stain provides the longest-lasting finish.
How Do You Seal Cedar Without Changing Color?
You seal cedar without changing its color by applying a clear or natural-tone penetrating wood sealer that blocks moisture and UV without adding pigment. Look for products labeled as clear wood preservatives or natural-tone sealers with UV inhibitors. Keep in mind that clear sealers provide the least UV protection of any finish type, so the cedar will gradually gray over time even with a clear sealer applied. Re-application is needed every 1 to 3 years for clear sealers, compared to 3 to 5 years for pigmented stains. Adding a small amount of pigment, even in a natural cedar tone, significantly increases UV protection and extends the re-application interval.
How Much Does It Cost to Install Cedar Siding?
Cedar siding installation costs $6 to $16 per square foot in 2026, including materials and labor. For a typical 2,000-square-foot home, the total project ranges from $12,000 to $28,000 depending on the cedar species, wood grade, siding profile, and complexity of the installation. Cedar bevel siding is the most affordable profile at $6 to $12 per square foot installed. Cedar shakes are the most expensive at $7 to $16 per square foot because of the additional labor required for individual shake placement. Budget an additional $1,000 to $3,000 for old siding removal if the existing siding needs to come off before the new cedar goes on. A full home remodel that includes siding replacement can coordinate the siding work with window, trim, and insulation upgrades for better overall results and lower combined labor costs.
Is Cedar Siding Worth It?
Cedar siding is worth it for homeowners who value natural wood aesthetics, are willing to maintain the finish on a regular schedule, and plan to stay in the home long enough to enjoy the material's 20-to-40-year lifespan. Cedar delivers a warmth, grain depth, and visual character that no manufactured siding material can replicate. The global pergola and outdoor living structures market reflects this trend, with the American Institute of Architects reporting that natural wood and outdoor living features were the most requested residential design elements in 2024 for the fifth consecutive year. Cedar siding increases curb appeal and aligns with a premium exterior aesthetic that complements custom outdoor living spaces, decks, and timber features.
The Bottom Line
Installing cedar siding starts with what you cannot see: a breathable house wrap, properly installed flashing, and a furring strip rainscreen that gives moisture a way out. The siding itself goes on from the bottom up, one course at a time, fastened with stainless steel ring-shank nails that penetrate at least 1-1/4 inches into solid framing. Every board should be acclimated to your climate, pre-finished on all six sides, and sealed at every cut end before it goes on the wall. The method varies by profile, but the fundamentals stay the same: keep water out, let moisture escape, and let the wood move with the seasons.
Cedar siding rewards the homeowner who treats it right. Regular cleaning, periodic re-staining, and prompt repairs keep the wood protected and looking its best for decades. At AZ Builders LLC, we install cedar, LP SmartSide, fiber cement, and metal siding across Central Washington with the same precision and care on every project. If you are planning a siding installation or want to discuss which material fits your home, give us a call at (509) 661-2919.
.webp)

.webp)
.webp)
You May Also Like

.webp)


%201.webp)
%202.webp)
%203.webp)
.webp)


.avif)