
.webp)


How to Build a Pergola Attached to the House
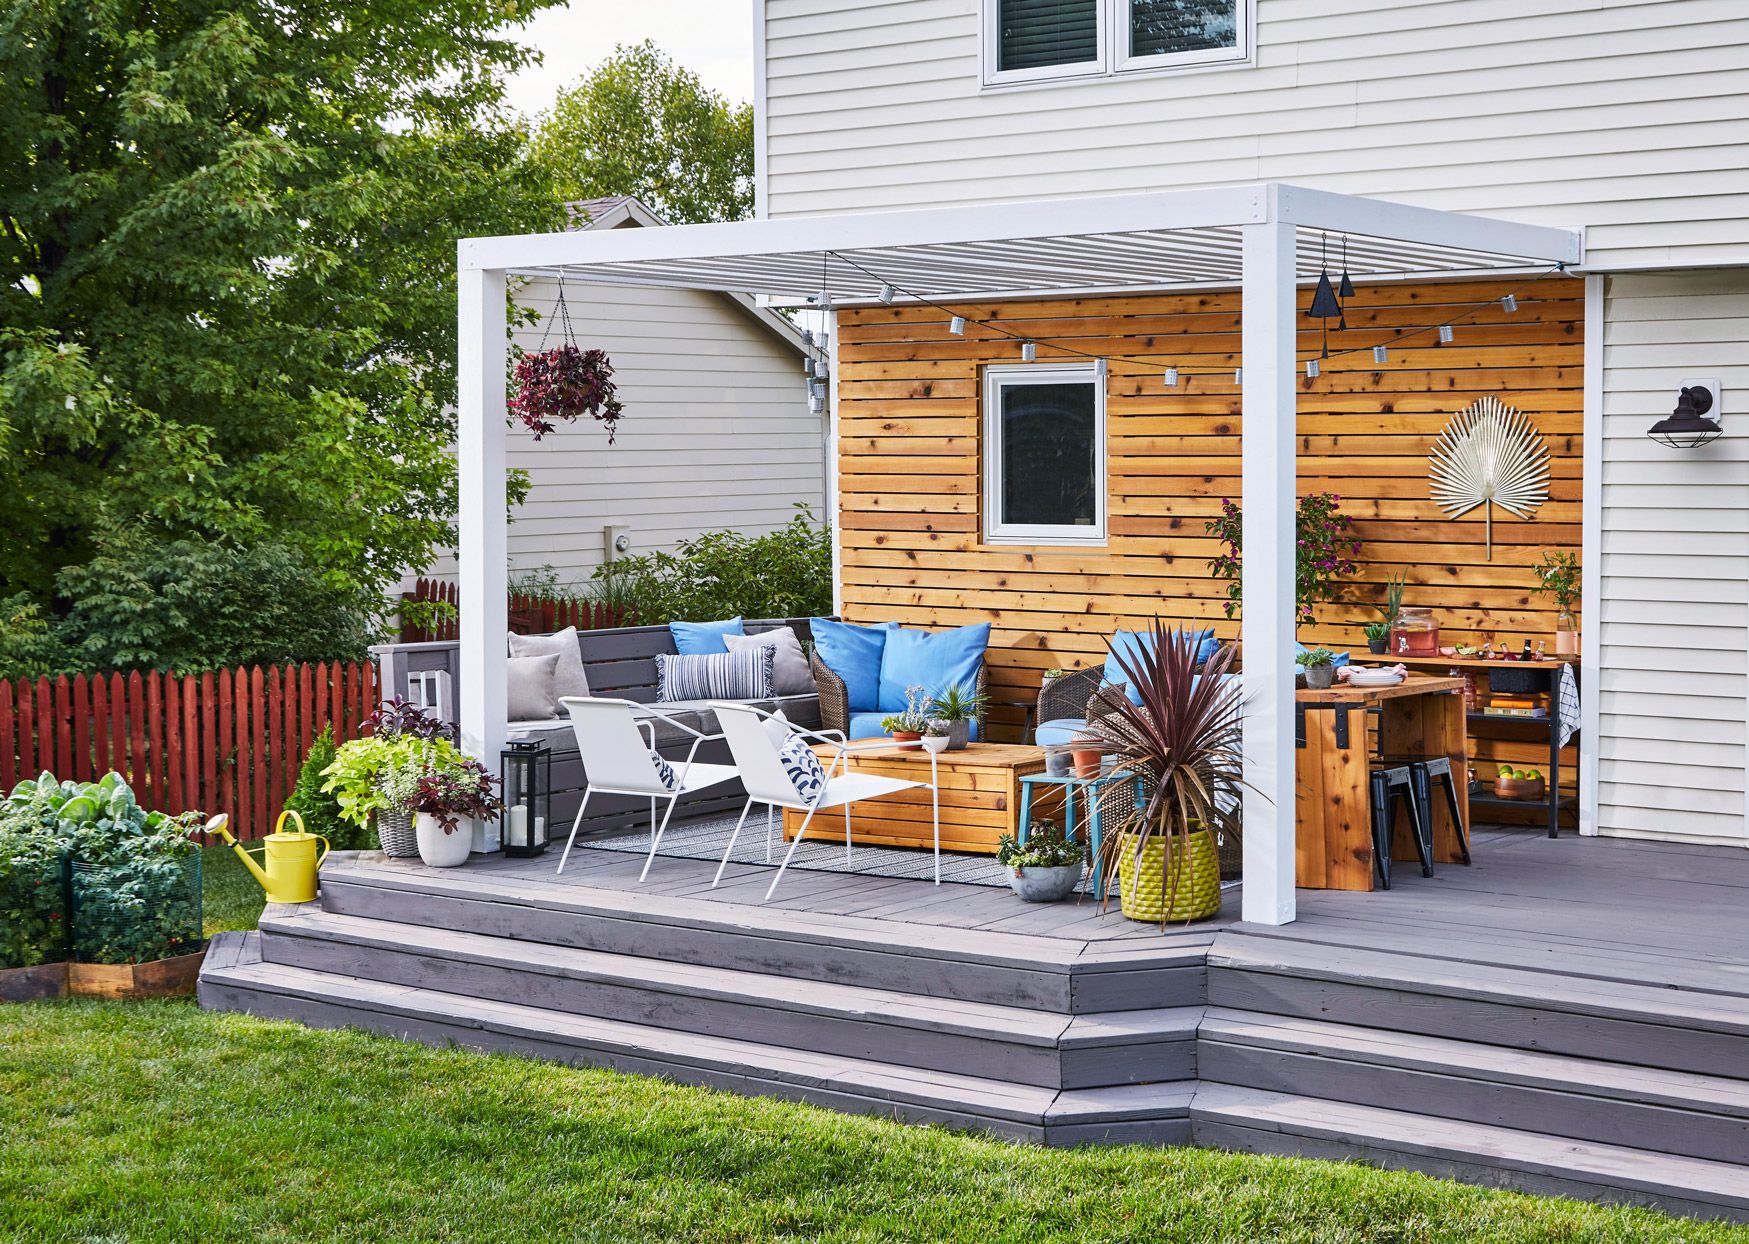
Yes, you can build a pergola attached to your house, and doing so creates a seamless transition between indoor and outdoor living space that a freestanding pergola cannot match. An attached pergola connects to the home's structural framing through a horizontal board called a ledger, which supports one side of the pergola's roof structure. The opposite side rests on posts set into concrete footings. According to Zillow data reported by House Beautiful in 2026, homes with pergolas sell more than three days faster and for 2.2% more than comparable homes without one, and attached pergolas tend to deliver higher resale value than freestanding structures because buyers perceive them as a permanent extension of the home.
This guide covers the full process of building a pergola attached to the house, from planning and permits through the final rafter installation. We explain how the ledger board connects to the wall, why flashing is the single most important detail in the entire project, how the attachment method changes depending on your siding type, what it costs, and which mistakes to avoid.
How to Build a Pergola Attached to the House Step by Step
Building a pergola attached to the house follows a specific sequence: check permits, plan the design, install the ledger board with flashing, set the post footings, raise the posts, install the beams, and attach the rafters. Each step depends on the one before it. Skipping or reordering steps creates structural problems that are expensive to fix later.
- Check local building codes and pull permits. Attached pergolas almost always require a building permit because the structure modifies the home's exterior wall. Contact your local building department before starting any work. Permit costs average $60 to $150, according to HomeGuide.
- Plan the design and dimensions. Determine the pergola's width, depth, and height. A standard attached pergola uses a minimum height of 9 feet at the ledger board. Measure the wall where the ledger will mount and confirm the location of wall studs behind the siding. Create a simple blueprint showing all dimensions, post locations, and rafter spacing.
- Install the ledger board. Cut a 2x6 or 2x8 pressure-treated or sealed lumber board to the planned width. Remove the siding at the mounting location to expose the sheathing and framing. Fasten the ledger to the wall studs or rim joist with 1/2-inch galvanized or stainless steel lag bolts, two bolts per stud. Level the ledger precisely before tightening all bolts. Even a half-inch tilt at the ledger shows up painfully in the rafters later.
- Install Z-flashing above the ledger. Tuck metal Z-flashing behind the siding above the ledger board so it overlaps the top edge of the ledger. The flashing directs water over and away from the connection point. This is the single most critical step in the entire project. Seal the top edge of the flashing with exterior-grade caulk.
- Dig post holes and pour concrete footings. Mark the locations for the outer posts directly below the ends of the ledger board. Dig holes deep enough to extend below the local frost line. Pour concrete footings with embedded post anchors. Allow the concrete to cure for at least 48 hours before setting posts.
- Set the posts. An attached pergola needs only two posts on the outer edge because the house wall supports the ledger side. Plumb each post in both directions, brace it temporarily, and secure it to the post anchor. Standard post sizes are 4x4 or 6x6 depending on the pergola's span and load requirements.
- Install the beams. Place the beams across the tops of the posts, running parallel to the house wall. Secure the beams to the posts with through-bolts, carriage bolts, or approved post-to-beam connectors. Double beams (two boards sandwiching the post) provide additional strength and a clean finished look.
- Attach the rafters. The rafters run perpendicular to the house, connecting from the ledger board to the outer beam. Attach the rafter ends to the ledger using galvanized joist hangers. Secure the opposite rafter ends to the beam using galvanized hurricane ties. Space rafters no more than 16 inches apart for proper structural support.
- Add optional top slats, lattice, or shade elements. Narrower pieces of 2x2 or 1x3 lumber placed across the top of the rafters add additional shade and visual interest. Lattice panels, fabric canopies, or climbing vine supports can be added after the primary structure is complete.
- Finish and seal the wood. Apply a penetrating wood stain, sealant, or paint to protect the pergola from UV exposure and moisture. Seal all cut ends, bolt holes, and exposed end grain. Wood pergolas need resealing every 1 to 3 years depending on the finish and climate.
An attached pergola is a substantial construction project that involves modifying the home's exterior wall. If you are not confident working with structural framing, lag bolts, and flashing details, hiring a professional contractor is the safest path. We build custom outdoor living spaces designed for the Central Washington climate, including attached pergolas, decks, and patio covers.
What Is the Best Way to Attach a Pergola to a House?
The best way to attach a pergola to a house is through a ledger board bolted to the home's structural framing with corrosion-resistant lag fasteners, then capped with metal Z-flashing to prevent water intrusion. The ledger board distributes the pergola's weight evenly across multiple wall studs or across the rim joist. This method provides the strongest, most reliable connection because it transfers the load into the home's structural skeleton rather than relying on a single mounting point.
The ledger must penetrate through the siding and sheathing into the structural framing behind the wall. The siding itself, whether vinyl, wood, fiber cement, stucco, or brick veneer, cannot carry the weight of a pergola. Attaching only to the siding causes the connection to pull loose under wind load, snow load, or even the pergola's own dead weight. According to Western Timber Frame, the wall connection is the number one failure point for attached pergolas, and water intrusion at the ledger causes more problems than wind or weight combined.
What Is a Pergola Attached to a House Called?
A pergola attached to a house is called an attached pergola, a lean-to pergola, or a wall-mounted pergola. In some regions and building codes, an attached pergola with a solid or semi-solid roof is classified as a patio cover or patio roof rather than a pergola. The distinction matters for permit purposes: a pergola traditionally has an open-rafter roof that provides partial shade, while a patio cover has a solid roof that provides full weather protection. Building codes in many jurisdictions treat solid-roof patio covers differently than open-rafter pergolas, often requiring more stringent structural engineering and inspection. A home renovation contractor familiar with local codes can clarify which classification applies to your project.
How to Flash a Pergola Ledger Board to Prevent Water Damage
Flashing a pergola ledger board prevents water damage by directing rain and runoff over and away from the connection point between the pergola and the house wall. Without proper flashing, water seeps behind the ledger, enters the wall cavity, saturates the sheathing and framing, and causes hidden rot that can spread for years before it becomes visible. According to multiple building science sources, improper flashing is the single most common cause of failure in attached outdoor structures.
The flashing principle is simple: every layer above overlaps the layer below, like shingles on a roof. Metal Z-flashing or cap flashing sits on top of the ledger board with its upper leg tucked behind the siding and the home's weather-resistant barrier (house wrap). The lower leg of the flashing extends past the face of the ledger with a slight outward slope and a drip edge so water falls away from the wall instead of running down behind the ledger. Self-adhering butyl flashing tape connects the upper leg of the metal flashing to the house wrap for a watertight seal.
Skipping the flashing or relying on caulk alone is the most common shortcut homeowners take, and it is the one that causes the most expensive damage. Caulk degrades in UV light and temperature cycling within 3 to 5 years. Metal flashing properly integrated with the house wrap lasts the life of the structure. Every siding project we complete includes proper flashing at every wall penetration and connection point because flashing failures are among the most preventable and most costly problems a home can develop.
How to Attach a Pergola to Different Siding Types
The method for attaching a pergola changes depending on the siding material because each type requires a different approach to removing or working around the cladding to reach the structural framing behind it. The structural connection always goes into the framing, not the siding. The siding is only a weather barrier and has no load-bearing capacity.
For vinyl or fiber cement lap siding, remove the course of siding at and above the ledger location using a siding removal tool or by reversing the fasteners. Install the ledger and flashing directly against the sheathing and framing. Reinstall the siding above the flashing so it overlaps the top edge, locking the flashing in place. For wood siding, the process is similar: cut or remove the siding boards at the ledger location, attach the ledger to the framing, install Z-flashing, and replace the siding above.
For brick veneer, the connection must pass through the veneer and into the structural framing behind it using masonry anchors or through-bolts with spacers. Brick veneer is not structural and cannot support a pergola on its own. Use spacers or stacked washers between the ledger and the brick face to create an air gap that allows the wall to drain properly. For stucco, cut back the stucco at the ledger location to expose the sheathing and framing underneath. Attach the ledger to the framing, flash above the connection, and seal the stucco edges with compatible caulk. A full home remodel that includes an attached pergola addresses all of these siding-specific details during the design phase so there are no surprises during construction.
Do I Need a Permit for a Pergola Attached to My House?
Yes, in almost all jurisdictions you need a building permit for a pergola attached to your house, regardless of the pergola's size. Attached structures modify the home's exterior wall and affect the building envelope, which triggers permit requirements in nearly every municipal building code. Even in jurisdictions where freestanding pergolas under 200 square feet are exempt from permits, attached pergolas are typically regulated because the ledger connection creates a structural tie to the home.
The permit application usually requires a site plan showing the pergola's location, dimensions, and distance from property lines; a structural detail showing how the ledger attaches to the house; and specifications for the post footings, beam sizes, and rafter spacing. Some jurisdictions require a licensed contractor or engineer to submit the plans. Permit costs average $60 to $150, according to HomeGuide. Building without a permit can result in fines, mandatory removal, or complications during a future home sale when an inspector discovers an unpermitted structure attached to the house. Always check with your local building department before starting work.
How Much Does It Cost to Build a Pergola Attached to a House?
Building a pergola attached to a house costs $2,120 to $6,435 for a professionally installed structure, with most homeowners spending around $4,255, according to Angi's 2026 data. Attached pergolas cost slightly less than freestanding pergolas of the same size because they require only two posts instead of four, reducing both material and labor. The total cost depends on the pergola's size, material, roof style, and any additional features like lighting, fans, or retractable shade.
Pergola SizeEstimated Cost (Installed)8 x 10 feet (80 sq ft)$1,600 to $4,80010 x 12 feet (120 sq ft)$2,400 to $7,20012 x 16 feet (192 sq ft)$3,800 to $11,50012 x 20 feet (240 sq ft)$4,800 to $14,400
Sources: Angi 2026 data, HomeGuide, Arrow Outdoor Living. Costs based on $20-$60/sq ft range for materials and labor. Actual costs vary by region, material, and design complexity.
Material choice is the single largest cost variable. Cedar runs $25 to $35 per square foot, pressure-treated pine runs $20 to $35 per square foot, and aluminum runs $10 to $30 per square foot, according to Angi. Adding electrical wiring for lighting or fans adds $500 to $2,000. Motorized louvered roof systems can push the total cost of an attached pergola to $36,000 to $48,000 for a large, fully featured installation. Understanding the full scope of remodeling costs before committing helps homeowners set realistic budgets and avoid mid-project surprises.
What Are Common Attached Pergola Mistakes?
The most common attached pergola mistakes are skipping the flashing, attaching the ledger to the siding instead of the framing, undersizing the footings, building without a permit, and ignoring the local frost line when pouring footings. Each of these errors compromises either the structure's safety or the home's building envelope.
- No flashing or caulk-only flashing. Metal Z-flashing integrated with the house wrap is the only reliable method. Caulk alone fails within 3 to 5 years, and the resulting water damage can cost thousands to repair.
- Attaching the ledger to siding. Vinyl, fiber cement, stucco, and brick veneer cannot support structural loads. The ledger must be lag-bolted into wall studs, the rim joist, or the band board behind the siding.
- Undersized footings. Post footings that do not extend below the local frost line will heave during freeze-thaw cycles, tilting the posts and pulling the pergola out of level. In Central Washington, frost line depth requires footings that go well below the surface.
- No building permit. Attached pergolas require permits in nearly all jurisdictions. An unpermitted structure can delay or derail a future home sale and may need to be removed at the homeowner's expense.
- Wrong fastener type. Galvanized or stainless steel lag bolts and structural connectors are required for all outdoor structural connections. Standard interior screws or nails corrode and lose holding strength within a few years of weather exposure.
- Spacing rafters too far apart. Rafters spaced more than 16 inches apart lack the structural support to handle wind uplift and snow loads. Wider spacing also reduces shade coverage and visual proportion.
Avoiding these mistakes starts with planning the project thoroughly before the first bolt is drilled. A professional contractor who has experience with outdoor living construction handles these details as standard practice because each one has a direct impact on the structure's safety and longevity.
Frequently Asked Questions
What Are the Rules for Building a Pergola?
The rules for building a pergola vary by municipality but generally include: setback distances from property lines (typically 3 to 10 feet for side yards and 5 to 15 feet for rear yards), maximum height limits (usually 10 to 12 feet for accessory structures), and permit requirements for attached structures or those exceeding 200 square feet. Homeowners associations may impose additional restrictions on materials, colors, and placement. Always verify the specific rules with your local building department before starting construction.
Is a Pergola a Permanent Structure?
A pergola is considered a permanent structure when it is bolted to concrete footings or attached to a home's structural framing. Appraisers and building departments classify permanently anchored pergolas as real property improvements that add to the home's appraised value. Kit pergolas that rest on a deck surface without anchoring are typically classified as temporary outdoor furniture and do not count as permanent improvements. An attached pergola is almost always classified as permanent because it modifies the home's exterior wall. Pergolas that are permanently installed deliver a return on investment of 50% to 80% of the project cost at resale, according to multiple industry sources.
What Are the Disadvantages of a Pergola?
The disadvantages of a pergola include limited weather protection (an open-rafter pergola does not block rain), ongoing maintenance for wood structures (staining or sealing every 1 to 3 years), the need for building permits for attached designs, and the potential for water damage at the wall connection if flashing is not installed correctly. These disadvantages are manageable with proper planning, quality materials, and professional installation. For homeowners who want full rain protection, a solid patio cover or a motorized louvered roof system provides complete shelter while maintaining the open-air feel of a pergola.
Is It Cheaper to Build a Pergola or Buy One?
Building a custom pergola on-site typically costs more in labor but produces a structure sized exactly for the space and built with heavier, more durable materials. Buying a prefabricated pergola kit costs less upfront, with DIY kits starting around $700 to $4,000, according to HomeGuide. However, kit pergolas use lighter materials, offer limited size options, and may not include the structural engineering needed for an attached installation. For a small, simple outdoor project, a kit can work well. For a larger attached pergola that needs to withstand wind, snow, and decades of weather, a custom-built structure provides better long-term value.
Can You Attach a Pergola to a Brick House?
Yes, you can attach a pergola to a brick house, but the connection must pass through the brick veneer and into the structural framing behind it. Brick veneer is a decorative facade, not a load-bearing wall. The ledger board needs to be anchored with masonry-rated sleeve or wedge anchors that reach the wood framing or concrete block behind the brick. Spacers between the ledger and the brick face create a drainage gap that prevents trapped moisture. A home renovation contractor with experience attaching structures to masonry walls verifies the wall type and selects the correct anchors and flashing method for the specific construction.
How Long Does It Take to Build an Attached Pergola?
Building an attached pergola takes 2 to 5 days of active construction for a professional crew, plus 1 to 4 weeks of lead time for permits, material ordering, and concrete curing. A DIY project typically takes 2 to 4 weekends depending on the builder's experience and the complexity of the design. The concrete footings alone require 48 hours of curing time before posts can be set, so the project cannot be completed in a single day regardless of crew size. Planning the design, pulling permits, and ordering materials should begin at least 3 to 4 weeks before the desired start date. A home exterior project that combines a pergola with siding, deck, or patio work benefits from coordinating all phases under a single contractor to reduce total project time.
Putting It All Together
An attached pergola transforms an ordinary patio or deck into a defined outdoor room that feels like a natural extension of the home. The structure's success depends almost entirely on two details that happen at the wall: the ledger board connection into the structural framing, and the flashing that keeps water out of the wall cavity. Get those two details right, and the pergola will perform for decades. Get either one wrong, and the resulting water damage can cost far more than the pergola itself.
For homeowners who want the project done right the first time, working with a contractor who understands structural connections, local building codes, and proper flashing techniques eliminates the risk of the most common and most expensive mistakes. Reach out to AZ Builders LLC at (509) 661-2919 for a free estimate on any outdoor living, siding, or renovation project.
.webp)

.webp)
.webp)
You May Also Like

.webp)


%201.webp)
%202.webp)
%203.webp)
.webp)


.avif)